bushart/otploginauthentication
Composer 安装命令:
composer require bushart/otploginauthentication
包简介
A simple modified otp authentication
README 文档
README
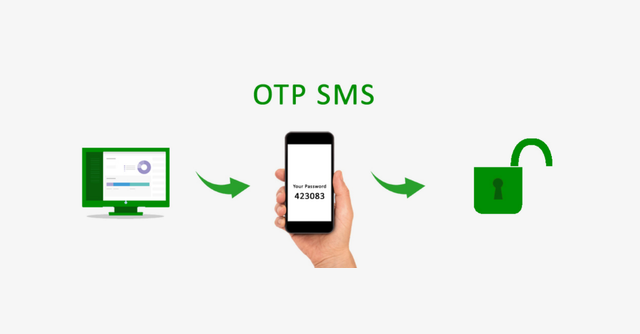
Two-factor authentication (2FA) adds an extra layer of security to your application by requiring users to provide a second factor of authentication, usually a code generated by an authentication app or sent via SMS. OTP stands for "one-time password", which means that the code is only valid for a short period of time and cannot be reused.
Installation
Here is the complete video of the usage and installation of the package.
Step 1: Install Laravel
This is optional; however, if you have not created the laravel app, then you may go ahead and execute the below command:
composer create-project laravel/laravel example-app
Step 2: Setup Database Configuration
After successfully installing the laravel app then after configuring the database setup. We will open the ".env" file and change the database name, username and password in the env file.
DB_CONNECTION=mysql
DB_HOST=127.0.0.1
DB_PORT=3306
DB_DATABASE=Enter_Your_Database_Name
DB_USERNAME=Enter_Your_Database_Username
DB_PASSWORD=Enter_Your_Database_Password
Step 3: Install Auth Scaffold
Laravel's laravel/ui package provides a quick way to scaffold all of the routes and views you need for authentication using a few simple commands:
composer require laravel/ui
Next, we need to generate auth scaffold with bootstrap, so let's run the below command:
php artisan ui bootstrap --auth
Then, install npm packages using the below command
npm install
At last, built bootstrap CSS using the below command:
npm run dev
Package Installation
composer require bushart/otploginauthentication
Run Command
Now, run migration with following command:
php artisan auth:otp
Now, run migration with following command:
php artisan migrate
Step 4: Update Register Controller.
Update the below functions in the register controller.
 /**
     * Get a validator for an incoming registration request.
     *
     * @param  array $data
     * @return \Illuminate\Contracts\Validation\Validator
     */
    protected function validator(array $data)
    {
        return Validator::make($data, [
            'name' => ['required', 'string', 'max:255'],
            'email' => ['required', 'string', 'email', 'max:255', 'unique:users'],
            'mobile_no' => ['required', 'regex:/^\+(?:[0-9] ?){6,14}[0-9]$/', 'unique:users'],
            'password' => ['required', 'string', 'min:8', 'confirmed'],
        ]);
    }

    /**
     * Create a new user instance after a valid registration.
     *
     * @param  array $data
     * @return \App\Models\User
     */
    protected function create(array $data)
    {
        return User::create([
            'name' => $data['name'],
            'email' => $data['email'],
            'mobile_no' => str_replace(' ', '', $data['mobile_no']),
            'password' => Hash::make($data['password']),
        ]);
    }
Step 5: Configure sender mail address in laravel .env file
.env file:
MAIL_DRIVER=smtp
MAIL_HOST=smtp.mailtrap.io
MAIL_PORT=587
MAIL_USERNAME=null
MAIL_PASSWORD=null
MAIL_ENCRYPTION=TLS
Step 6: Create Twilio Account
First you need to create and add phone number. then you can easily get account SID, Token and Number.
Create Account from here: www.twilio.com.
Next add Twilio Phone Number
Next you can get account SID, Token and Number and add these in the .env file like bellow:
.env
TWILIO_ACCOUNT_SID=XXXXXXXXXXXXXXXXX
TWILIO_AUTH_TOKEN=XXXXXXXXXXXXX
TWILIO_NUMBER=+XXXXXXXXXXX
All the required steps have been done, now you have to type the given below command and hit enter to run the Laravel app:
php artisan serve
Now, Go to your web browser, type the given URL and view the app output:
http://localhost:8000/login
I hope it can help you...
bushart/otploginauthentication 适用场景与选型建议
bushart/otploginauthentication 是一款 基于 PHP 开发的 Composer 扩展包,目前已累计 39 次下载、GitHub Stars 达 1, 最近一次更新时间为 2023 年 05 月 09 日, 在 PHP 生态内属于活跃度较高的组件。
我们在过去多个企业项目中使用过 bushart/otploginauthentication 或与其功能相近的方案,如果你在选型或落地过程中遇到问题,例如 版本兼容、二次改造、私有化封装、与内部系统对接、生产 BUG 排查,欢迎联系我们协助评估。
基于 bushart/otploginauthentication 在你已有业务上做功能扩展、字段裁剪、UI 适配、与内部账号 / 权限 / 日志系统的深度对接。
线上偶发问题、内存泄漏、慢查询、并发异常等排查修复;针对高流量场景做缓存、队列、索引层面的调优。
承接完整的项目从需求 → 设计 → 开发 → 上线 → 长期运维;也可按月提供技术保姆服务。
统计信息
- 总下载量: 39
- 月度下载量: 0
- 日度下载量: 0
- 收藏数: 1
- 点击次数: 9
- 依赖项目数: 0
- 推荐数: 0
其他信息
- 授权协议: MIT
- 更新时间: 2023-05-09